IMAGES TAKEN NEAR TO
Hawbush Road, BRIERLEY HILL, DY5 3PN
Introduction
This page details the photographs taken nearby to Hawbush Road, DY5 3PN by members of the Geograph project.
The Geograph project started in 2005 with the aim of publishing, organising and preserving representative images for every square kilometre of Great Britain, Ireland and the Isle of Man.

There are currently over 7.5m images from over14,400 individuals and you can help contribute to the project by visiting https://www.geograph.org.uk
Image Map
Images are licensed for reuse under creativecommons.org/licenses/by-sa/2.0
Notes
- Clicking on the map will re-center to the selected point.
- The higher the marker number, the further away the image location is from the centre of the postcode.
Image Listing (95 Images Found)
Images are licensed for reuse under creativecommons.org/licenses/by-sa/2.0
Image
Details
Distance
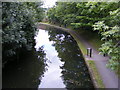
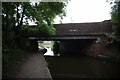
1
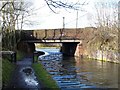
Leys Bridge
Road Bridge over the Stourbridge Canal.
Image: © Stephen Rogerson
Taken: 27 Feb 2011
0.09 miles
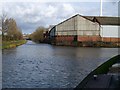
2
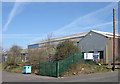
Industrial units near Brierley Hill near Dudley
The units are on the north side of Moor Street, shown in 2007.
Image: © Roger Kidd
Taken: 4 Apr 2007
0.11 miles
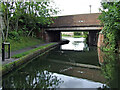
4
Stourbridge Canal - Leys Bridge
Joins the Stourbridge Canal beyond the bridge at Leys Junction.
The Stourbridge Canal continues to the left, down the Stourbridge flight of sixteen locks. To the north-east is the Fens Branch, which was built as a feeder from the pools near Bromley.
Image: © John M
Taken: 5 Jul 2008
0.11 miles
5
Canal View
The Stourbridge Canal which goes on to join to Dudley No 1 Canal, viewed from Leys Road Bridge.
Image: © Gordon Griffiths
Taken: 3 Aug 2010
0.11 miles
7
Stourbridge Canal Junction
This is a junction where the Stourbridge Canal goes to the right through Brierley Hill and the other fork continues up to Fens Pool where it stops.
Image: © Stephen Rogerson
Taken: 27 Feb 2011
0.12 miles
8
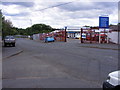
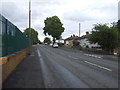
Tradequip View
The welding supplier on Leys Road.
Image: © Gordon Griffiths
Taken: 3 Aug 2010
0.12 miles
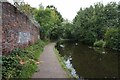
10
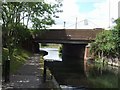
Leys Bridge west of Brierley Hill, Dudley
Leys Bridge carries Leys Road. Beyond the bridge is Leys Junction, where the Fens Branch of the Stourbridge Canal leads to the north-east.
Image: © Roger Kidd
Taken: 27 Aug 2010
0.13 miles