IMAGES TAKEN NEAR TO
Crawley Road, WALLSEND, NE28 6AR
Introduction
This page details the photographs taken nearby to Crawley Road, NE28 6AR by members of the Geograph project.
The Geograph project started in 2005 with the aim of publishing, organising and preserving representative images for every square kilometre of Great Britain, Ireland and the Isle of Man.

There are currently over 7.5m images from over14,400 individuals and you can help contribute to the project by visiting https://www.geograph.org.uk
Image Map
Images are licensed for reuse under creativecommons.org/licenses/by-sa/2.0
Notes
- Clicking on the map will re-center to the selected point.
- The higher the marker number, the further away the image location is from the centre of the postcode.
Image Listing (123 Images Found)
Images are licensed for reuse under creativecommons.org/licenses/by-sa/2.0
Image
Details
Distance
3
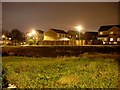
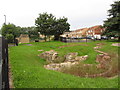
Former route of Hadrian's Wall
Into Wallsend. Looking to Plantation Street from Neptune Road.
Image: © Stephen Sweeney
Taken: 7 Jan 2009
0.11 miles
5
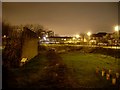
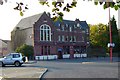
Replica of Hadrian's Wall
Exact copy of how the wall would have looked, located right beside its original route.
Image: © Stephen Sweeney
Taken: 7 Jan 2009
0.12 miles
6
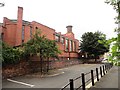
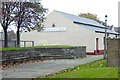
St Columba's R C Church, Wallsend
On Carville Road, next to the bus station, this modernist brick church was built in 1957 to replace an earlier 19th church.
Image: © Robert Graham
Taken: 24 Jul 2013
0.12 miles
7

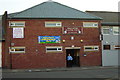
Church of Our Lady and St Columba, Carville Road, Wallsend
Designed by Newcastle architect Vincente Stienlet in a style described as, “a fusion of Perpendicular Gothic freely interpreted in a modern idiom and infused with Scandinavian and Art Deco elements”, this 1957 brick-built church is Grade II Listed.
Image: © Geoff Holland
Taken: 22 Jul 2025
0.12 miles
8
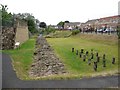
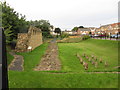
Remains of Hadrian's Wall, off Buddle Street, Wallsend
A reconstruction of the Wall has been built on the left. The stakes on the right were placed in an array of pits found during excavation on the north side of the Wall and may have been additional defences known as 'cippi pits'.
Archaeologists have never had proof that the top of the Wall could be walked on, because there is no place where it survives to full height. Since 2000, north of the Wall, between the wall and its ditch, three rows of large post holes have been found at Wallsend, at Shields Road, Byker, and over a 1km length between Throckley and Heddon-on-the-Wall. Rather than being man-traps (lilia) these pits were emplacements for an impenetrable entanglement of forked branches (cippi). Their purpose (described by Julius Caesar) was to slow down attackers and make them vulnerable to projectiles thrown by troops on a defensive rampart, holding up the attack for long enough for reinforcements to arrive. These obstacles would only have been effective if the ditch and berm of Hadrian’s Wall could be commanded from the Wall-top. The discovery of the obstacles supports the view that there was a wall-walk and battlements along the top of Wall from which defenders could fight off attackers.
http://www.hadrianswallquest.co.uk/did-you-know
Image: © Andrew Curtis
Taken: 28 Jul 2013
0.12 miles