
IMAGES TAKEN NEAR TO
Welbeck Close, FELIXSTOWE, IP11 0TD
Introduction
This page details the photographs taken nearby to Welbeck Close, IP11 0TD by members of the Geograph project.
The Geograph project started in 2005 with the aim of publishing, organising and preserving representative images for every square kilometre of Great Britain, Ireland and the Isle of Man.

There are currently over 7.5m images from over14,400 individuals and you can help contribute to the project by visiting https://www.geograph.org.uk
Image Map
Images are licensed for reuse under creativecommons.org/licenses/by-sa/2.0
Notes
- Clicking on the map will re-center to the selected point.
- The higher the marker number, the further away the image location is from the centre of the postcode.
Image Listing (33 Images Found)
Images are licensed for reuse under creativecommons.org/licenses/by-sa/2.0
Image
Details
Distance
1
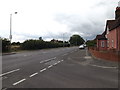
High Road, Trimley St Mary
At the junction with Spriteshall Lane
Image: © Geographer
Taken: 12 Jul 2015
0.11 miles
2
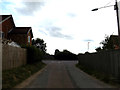
Spriteshall Lane, Trimley St Mary
At the junction with High Road
Image: © Geographer
Taken: 12 Jul 2015
0.12 miles
3
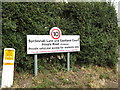
Spriteshall Lane & Eastland Court sign
On Spriteshall Lane at the junction with High Road
Image: © Geographer
Taken: 12 Jul 2015
0.12 miles
4
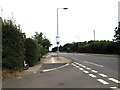
High Road, Trimley St Mary
At the junction with Spriteshall Lane
Image: © Geographer
Taken: 12 Jul 2015
0.13 miles
5
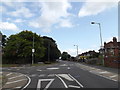
High Road, Trimley St. Mary
At the junction with Faulkeners Way
Image: © Geographer
Taken: 12 Jul 2015
0.14 miles
6
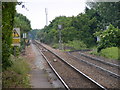
East of Trimley Station
On the left the single line can be seen heading towards Felixstowe station and the eastern end of the Port of Felixstowe freight loop. The line on the right can be seen curving sharply to the right as it enters the western end of the freight loop. Both these lines are signalled for bidirectional working and the sign on the left warns railway personnel of this. In the bottom left hand corner of the image can be seen part of the disused section of the station platform.
Image: © Glen Denny
Taken: 12 Jun 2010
0.17 miles
7

The railway east of Trimley Station
Class 66 66590 hauls a container train through the disused platform at Trimley station and is about to follow the sharp curve around to the right to gain access to the single line to Felixstowe North Quay Terminal, which is the western part of the docks loop line. The other track is used by both passenger services to and from Felixstowe, which is the next stop, and container trains using the eastern end of the docks loop line.
Image: © Glen Denny
Taken: 12 Jun 2010
0.17 miles
8
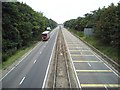
A14 Felixstowe Dock Spur Road
Road to Felixstowe Dock
Image: © Tim Marchant
Taken: 7 Aug 2009
0.17 miles
9
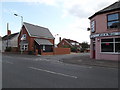
Kingsbury Road, Trimley St. Mary
At the junction with High Road
Image: © Geographer
Taken: 12 Jul 2015
0.18 miles
10
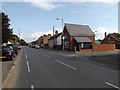
High Road, Trimley St Mary
At the junction with Kingsbury Road
Image: © Geographer
Taken: 12 Jul 2015
0.18 miles