
IMAGES TAKEN NEAR TO
Station Approach, ALTON, GU34 5EN
Introduction
This page details the photographs taken nearby to Station Approach, GU34 5EN by members of the Geograph project.
The Geograph project started in 2005 with the aim of publishing, organising and preserving representative images for every square kilometre of Great Britain, Ireland and the Isle of Man.

There are currently over 7.5m images from over14,400 individuals and you can help contribute to the project by visiting https://www.geograph.org.uk
Image Map
Images are licensed for reuse under creativecommons.org/licenses/by-sa/2.0
Notes
- Clicking on the map will re-center to the selected point.
- The higher the marker number, the further away the image location is from the centre of the postcode.
Image Listing (154 Images Found)
Images are licensed for reuse under creativecommons.org/licenses/by-sa/2.0
Image
Details
Distance
1
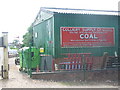
Colliery Supply Co.
Coal shed at Medstead and Four Marks Station on the Watercress Line which connects Alton with Alresford.
Image: © Colin Smith
Taken: 21 May 2011
0.04 miles
2
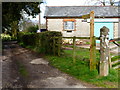
Stoney Lane goes north from the Watercress Line
Image: © Shazz
Taken: 24 Mar 2014
0.05 miles
3

Signal Box, Medstead and Four Marks Station
The Signal Box on the up-platform of Medstead and Four Marks Station on the Mid-Hants Railway. Taken from the down-platform.
Image: © Anthony Brunning
Taken: 29 May 2005
0.05 miles
4
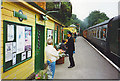
D-Day 50 at Medstead Station.
Re-created 1944 railway scene on the Watercress Line. Note the station sign has been "greened" out. Can you see the German soldier?!
Image: © Colin Smith
Taken: Unknown
0.05 miles
5
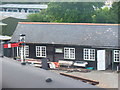
Signal & Telegraph Department
Ancillary building at Medstead and Four Marks Station, seen over a carriage roof of an Alton-bound train.
www.watercressline.co.uk
Image: © Colin Smith
Taken: 21 May 2011
0.05 miles
6
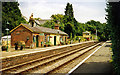
Medstead & Four Marks station, 1999
View east, towards Alton. Originally ex-LSWR Alton - Alresford - Winchester ('Watercress) line, closed 5/2/73. Purchased 11/75 as heritage Mid-Hants Railway, restored Alresford - Ropley 30/4/77,- Medstead 28/5/83,- Alton 25/5/85.
Image: © Ben Brooksbank
Taken: 28 Jul 1999
0.05 miles
7

Medstead & Four Marks station, with Alresford - Alton train 1999
View eastward, towards Alton; as Image The train is headed by LMS Ivatt class 2MT 2-6-2T No. 41312 (built 5/52, withdrawn 6/67).
Image: © Ben Brooksbank
Taken: 28 Jul 1999
0.05 miles
8
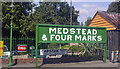
Medstead & Four Marks station name board, 2010
Beautifully restored by the Mid-Hants Railway on the eastbound side, seen from an Alton - Alresford DMU service.
Image: © Ben Brooksbank
Taken: 1 Sep 2010
0.05 miles
9
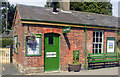
Upside conveniences, Medstead & Four Marks, 2010
Beautifully restored by the Mid-Hants Railway.
Image: © Ben Brooksbank
Taken: 1 Sep 2010
0.05 miles
10
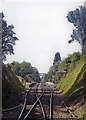
Mid-Hants Railway: approaching Medstead from the tunnel, 2010
View west, towards Alresford, on a DMU.
Image: © Ben Brooksbank
Taken: 1 Sep 2010
0.05 miles